Life is Strange
SPOILERS SPOILERS SPOILERS SPOILERS SPOILERS SPOILERS SPOILERS
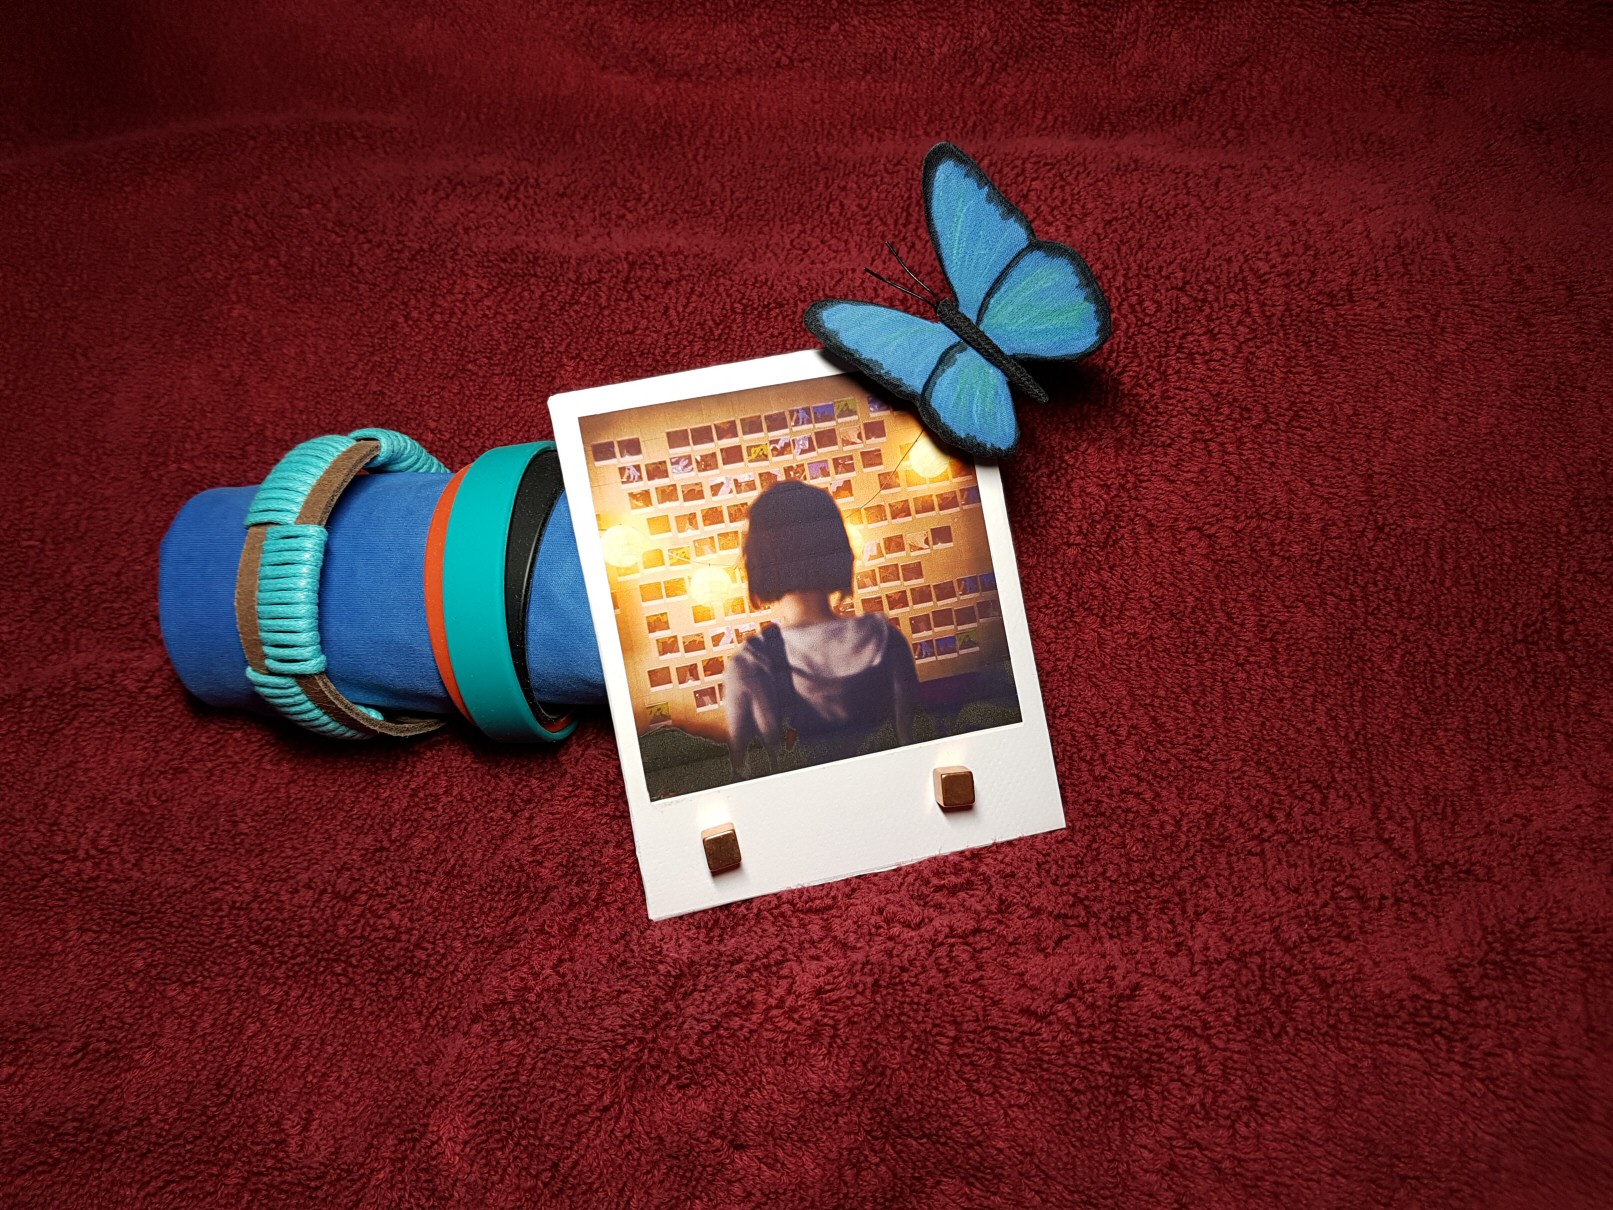
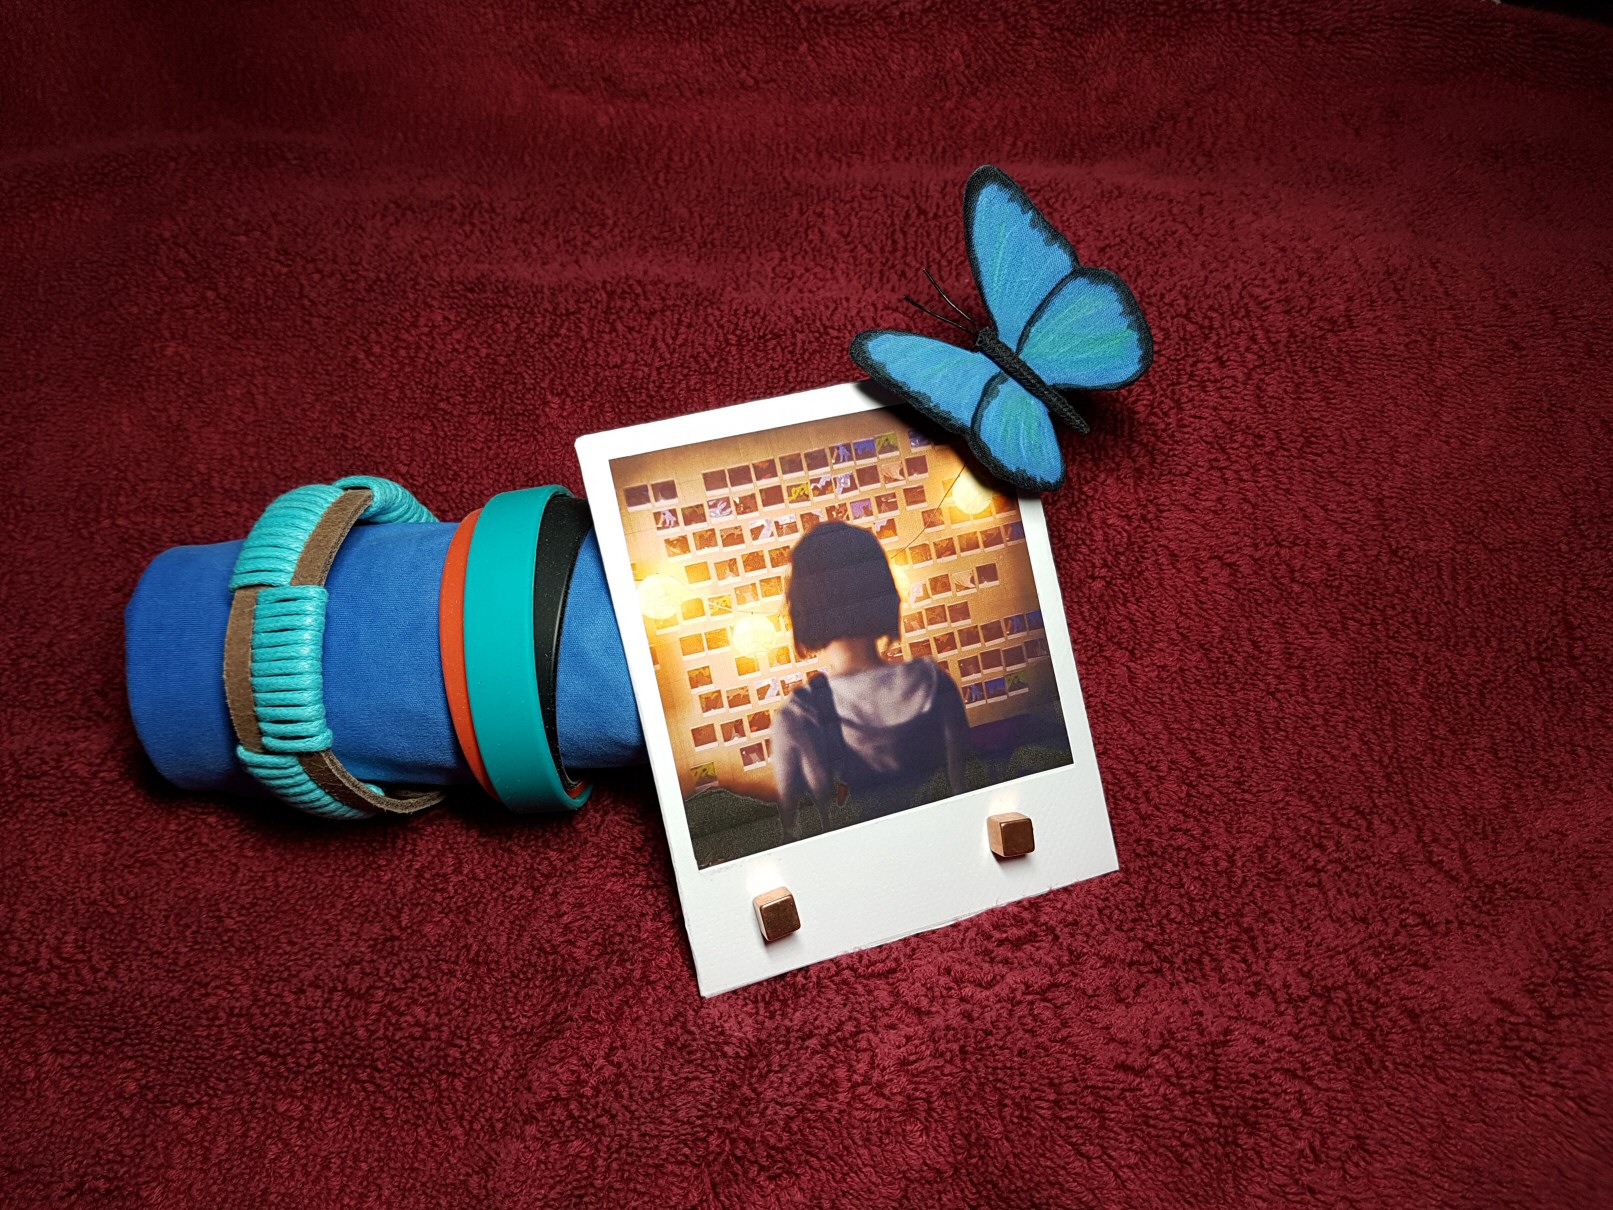
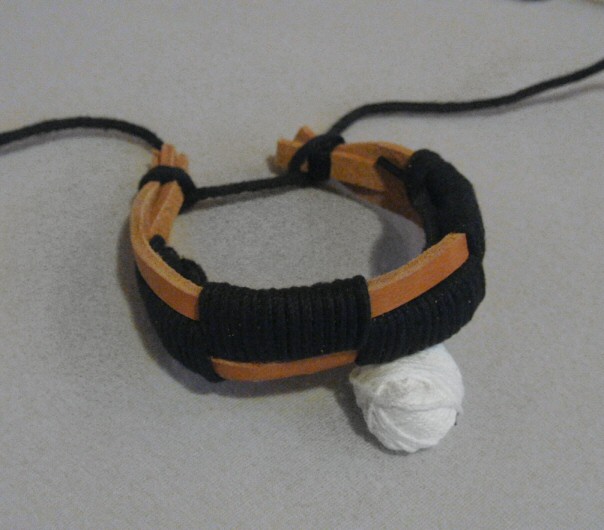
Max' Bracelet
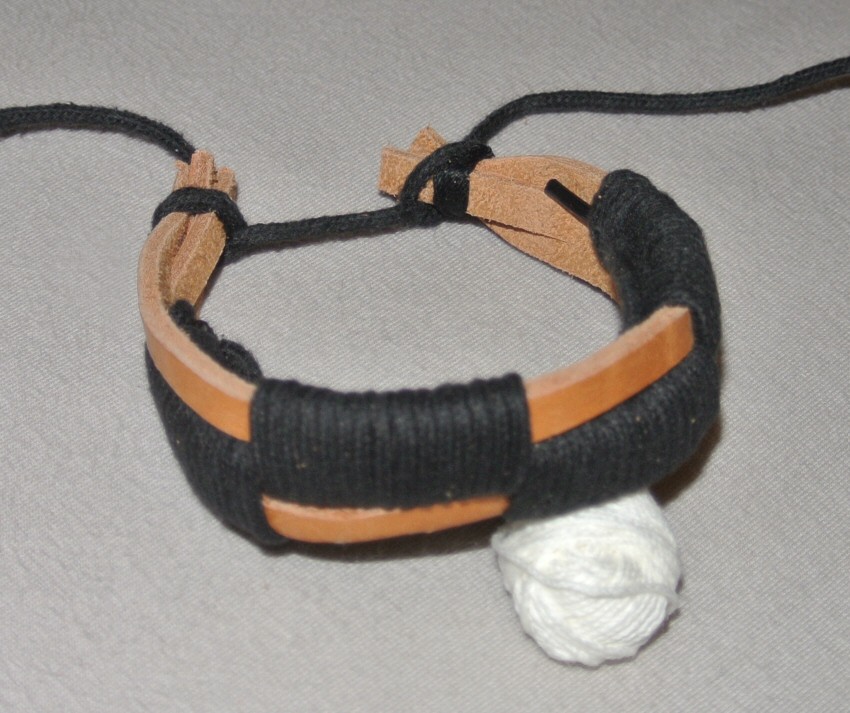
Max' bracelets are well known: black, red and cyan. I am not sure of the widths. My reference picture (which might have been not from in-game) showed them pretty much with the same width. They might be all silicone or of different materials like leather. I went with 3x silicone.
The layered look I wanted could not be created with three silicone bracelets, because if the are all the same size, they don't overlap. So what I ended up doing was cutting them and removing different sized pieces. Now they could be layered the way I wanted to create the nice combination of these three colors. Red and black pretty much side by side and cyan going over it slightly angled for a random look. As seen in the pictures: red and black go over one another so that on one side red is sewn above black and below black on the other side. That way they better keep their position and it looks more random/tangled.
I used a wide clothing-'rubber band' and sewed it to the silicone. Not very durable, as the silicone might tear. Also putting it on is challenging, because silicone doesn't slide very well.
Rachel Amber's Bracelet
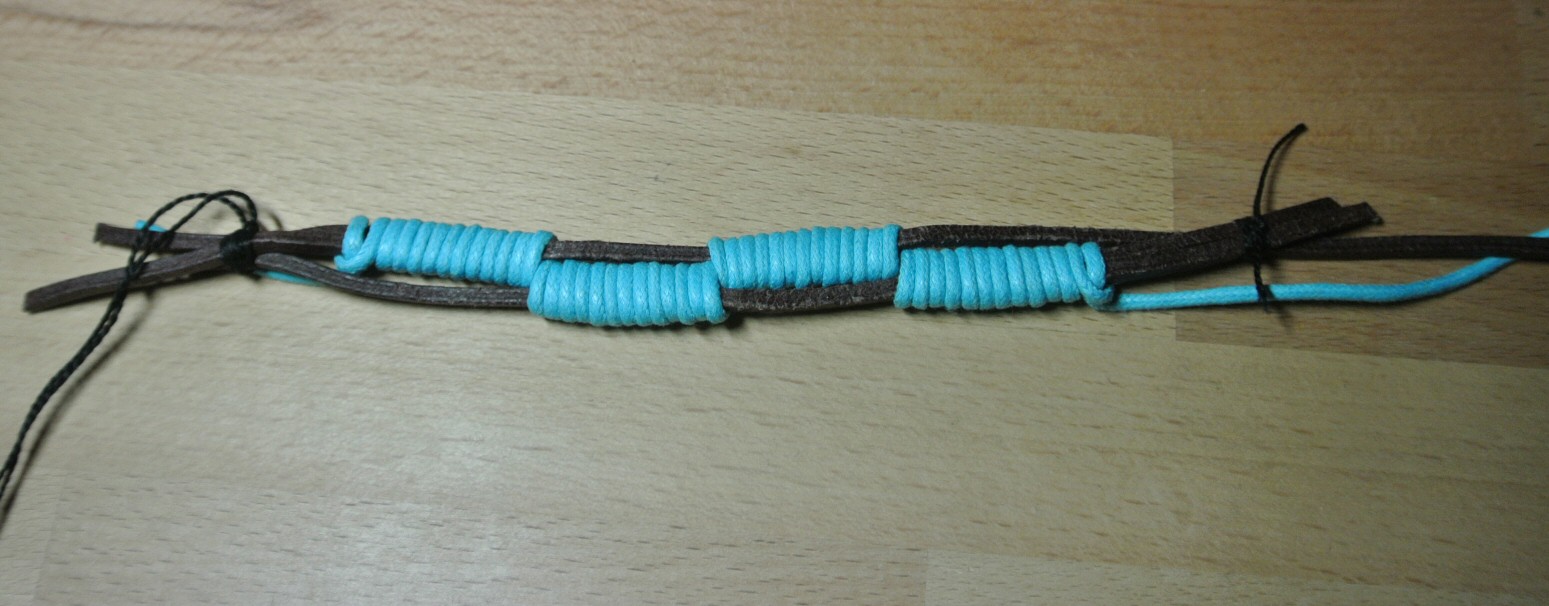
And in the tradition of trying things I haven't seen on the net: Rachel Amber's bracelet.
Some let's play video.
A few other references:
deviantart1
deviantart2
deviantart3
deviantart4
deviantart5
My first thought was 3 leather strips with large (maybe wooden) 'beads' or charms.
This is a bit unlikely as such large woods pieces are hard to find and also to make them round the holes for the leather couldn't be straight!
How to bore curving holes?? Are you cereal?
So after tearing my hair for a while I realized that it would make much more sense when the cyan parts were some thick cords wound around the leather srips.
Not as easy as it sounds.
I still haven't found
the perfect leather but I'm rather happy with the cyan on brown leather results and also the first try with dark brown cords on the pale leather.
The cords are just shoe laces. Also not perfect as they are waxed
and thus look too neat and tidy and not so soft like the dark
laces on the light leather.
It is better to use one large strip and only cut where necessary.
This simulates 3 strips while keeping a good stability.
The top view of the cutting pattern (not real dimensions) is in the image gallery.
As you can see I also tried 3 strips of leather which looks hella less clean.
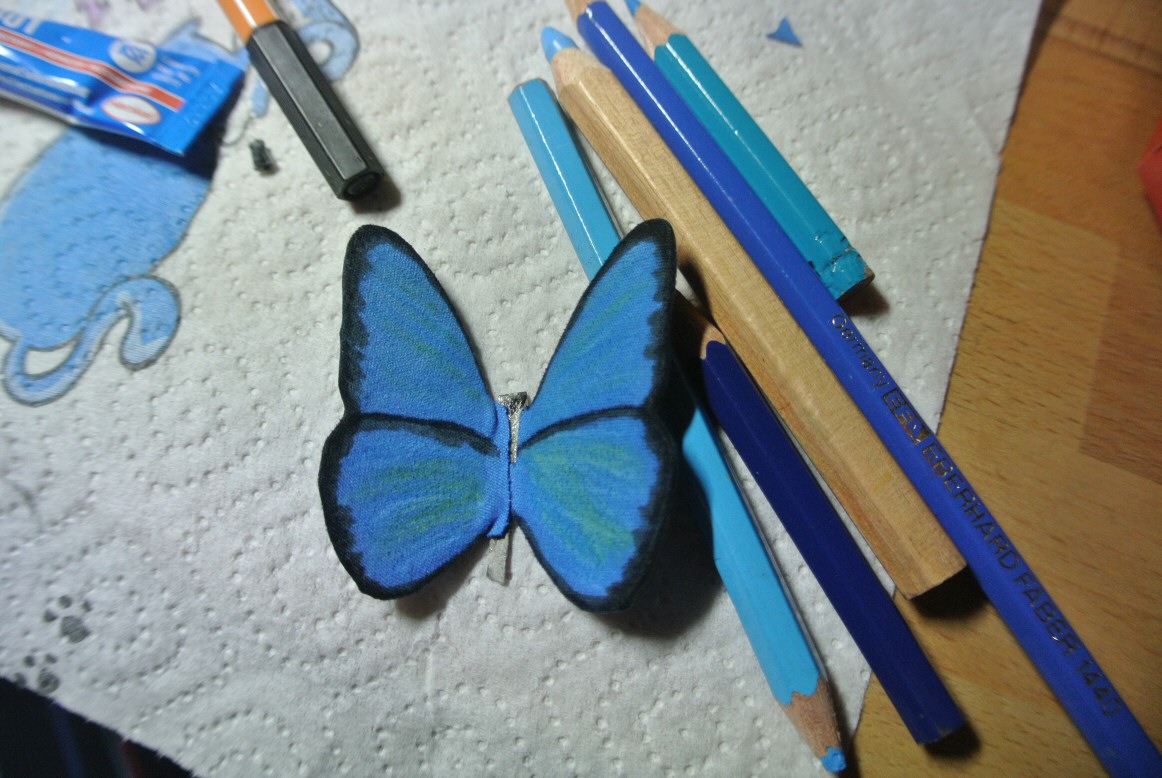
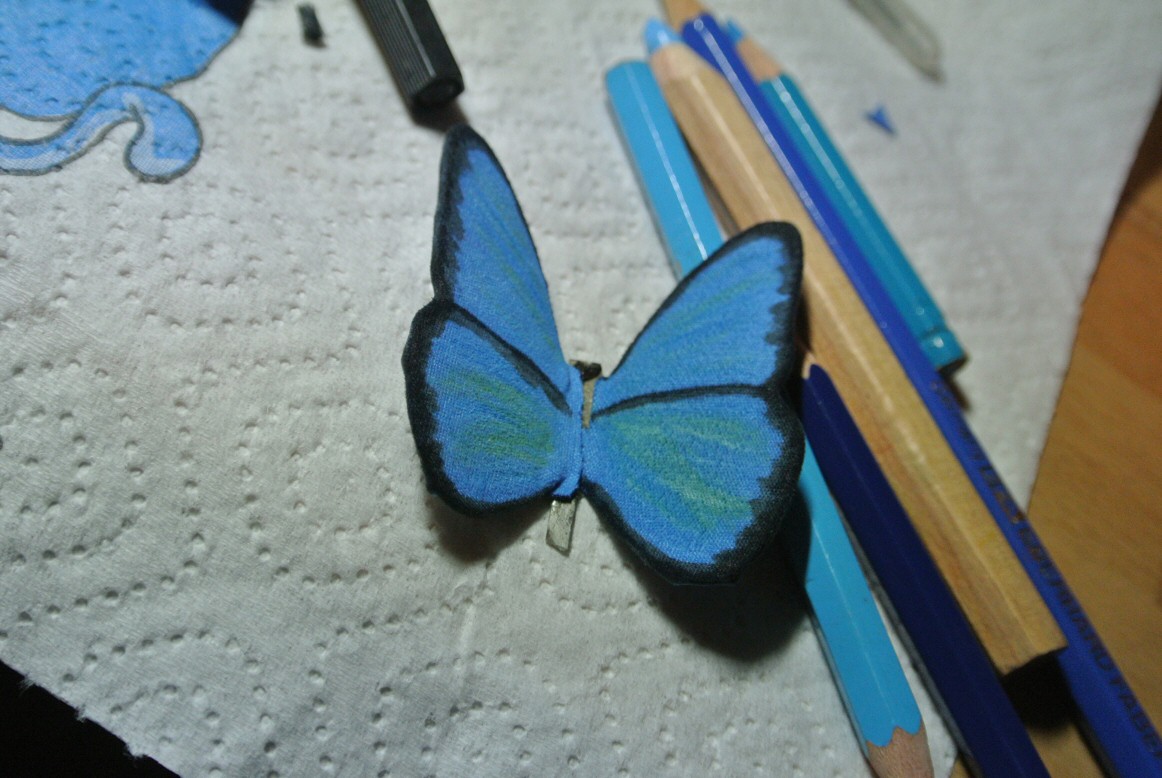
Butterfly
Note: This butterfly just looks good from above.
Materials:
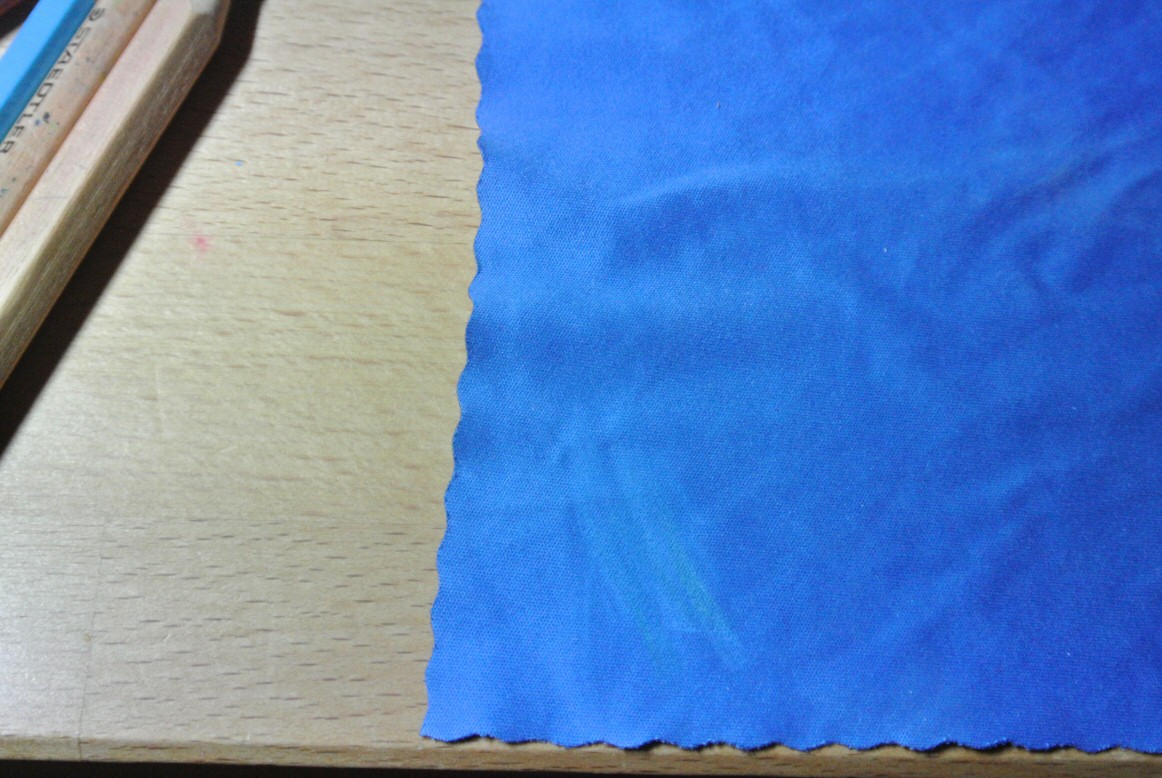
- blue microfiber cleaning cloth for glasses. It is thin and has this soft butterfly wing surface.
- cardboard
- thin standard superglue to soak into the cardboard
- piece of show lace for the body. Or whatever you think fits.
- stiff wire for the feelers.
The butterfly is cut out of cardboard and the cardboard is bent into shape. While in shape supermax superglue is soaked into the cardboard to stiffen it and lock its shape. Maybe one could just use plastic/metal with similar results? Anyway cardboard is easy to work with.
Then each wing is covered separately with cloth by pulling cloth around the wing edges and use little amount of glue to fixate it to the bottom of the wing. Begin with a small enough cloth and trim the ends later. The wing underside will not look neat with all that curled up cloth.
I used 2 different markers/sharpies to produce the deep black and the not so dark black wing painting. Before bringing some color onto the wings I tested different pencils on the cloth. From blue over green to yellow. More lightly applied colors make things interesting. Also different dark and light blue colors... whatever works best on your cloth.